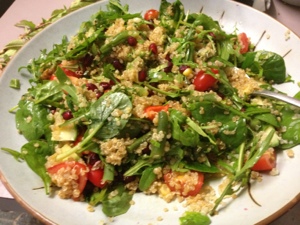
Fussy is as fussy does: hedgehog meatballs

Last night, my 4 year old (H) told me two things: 1. He hates tomatoes, which is such a pity as we planted about 15 tomato seedlings last year, mostly cherry and baby Roma, and have picked at least a bowlful each day for the past month or so; and 2. Tomato sauce, one of his favourite things, does not have tomatoes in it, despite the name. So I thought it was time to remind him that he does, actually, like tomatoes, just not fresh ones.

I guess, like lots of other kids, he is a fussy eater, but not always. There are a wide range of things he does eat, but equally there are things he ‘doesn’t’ – the reason for the inverted commas is that he generally does eat them, they are just hidden when he does. I aim to always put at least six vegetables in everything I make (before kids, this was ten types of vegies, but I’ve since reduced the self-pressure) – so when he eats the same foods elsewhere, he thinks they taste funny if there isn’t the same veg quotient… So ‘fussy’ is contextual. It’s also semantic: fussy might be the same as particular, dogmatic, demanding… but sometimes it’s just downright annoying.

A few years back, I came across a recipe that promised to be adored by children. It was in a slow cooking book by Sally Wise; I’ve adapted it a bit (to incorporate my magic 6) and usually do it on the stove. But, after days of fussiness (ie demanding), H ate a huge bowl of the meatballs and the bubaloo had two small serves.

She aims, she kicks, she scores!!!

Unfortunately, I didn’t score on the photos – apologies. They may not look so pretty but they taste good 🙂

Hedgehog meatballs

You will need:
For the meatballs:
1 kg minced beef
1/2 cup uncooked rice
2 small or 1 large eggs, lightly beaten
1 onion, finely chopped
1 stalk of celery, finely chopped
1 carrot, finely chopped
1 small zucchini, finely chopped
1 tbsp mixed herbs
2 tbsp tomato paste + 1/4 cup of condensed tomato soup (just open a 420g tin, I use salt reduced) OR equivalent tomato sauce
2 tbsp barbecue sauce
Salt and pepper

1. Combine all together in a bowl and mix well. Your hands are the best way to do this. Make into balls around 3 cm round.
2. Heat a splash of olive oil in a fry pan. Add 1 crushed clove of garlic (optional). Add the meatballs and brown.
3. Blend together (nb. new ingredients) the rest of the can of soup, 400ml water, and 1.5 cups (ish) tomato passata. Pour over the meatballs.
4. Cover and simmer for 1 1/2 hours or until the rice is cooked. Stir occasionally so the bottom doesn’t burn but do this carefully! The meatballs can fall apart if you are too rough.
5. Serve with steamed vegetables, mashed potatoes, or just plain. This makes enough for a few dinners.

As an aside, my partner told me that his mum used to make this when they were kids. So it’s not a new recipe idea, but it’s clearly a resurgent one 🙂

20130312-193140.jpg

20130312-193251.jpg

Midweek dinner: Chinese chicken omelette

We’re coming out of a bout of gastro at our place (is it distasteful to mention that when I’m writing about food? If so, apologies); well, the bubaloo had it and the rest of us fasted in unrealised anticipation. At the same time, the heat wave is continuing, with no end forecast for over a week. When these factors come together on a busy Wednesday evening, finding something for dinner can be challenging. So I turned to an old favourite, Chinese chicken omelette with some wilted vegies on the side. It’s lovely with chicken but that can be replaced by prawns, mushrooms or whatever you feel like.

But first, a bit of reminiscence… When I was doing my phd, there was nothing I liked more than, after a long day in the library or on my computer, hitting the cheap little Asian restaurants in the city. This usually meant Vietnamese pho or today’s recipe. I could walk in, order, and it would be ready within 3 minutes. What more could a tired gal want?

When I finished my studies and had kids, going into the city for quick cheap meals seemed like too much effort; I moved universities and suburbs. So I learned how to make it myself; the pho is still a memory but the omelette gets whipped up from time to time. If you don’t like the idea of this, but like eggs, be adventurous and give it a go – you may be pleasantly surprised!

Chinese chicken omelette

Serves 2-3

You will need:
6 small or 4 large eggs, lightly beaten with a fork
1.5 tbsp soy sauce or tamari
Sprinkle of pepper
1 cup shredded cooked chicken (left over BBQ chicken is ideal)
2 spring onions, finely sliced
2 tbsp coriander, chopped
Olive oil
3 tbsp oyster sauce
1.5 tbsp sesame oil

1 cup rice and 1.5 cups water: use together to cook rice using the absorption method (or use a rice cooker!).

1. Beat eggs until combined. Add pepper, soy sauce, most of the spring onions and most of the coriander, leaving a little for garnish. Using a fork, beat together well.
2. Place olive oil in frypan and heat. When it’s hot, pour in egg mix. As the edges become cooked, use a fork to draw the cooked edges toward the middle of the pan and swirl the uncooked egg mix to cover the base if the pan.
3. Sprinkle shredded chicken over the top. Repeat the process to draw the uncooked egg towards the middle until the egg is mostly cooked. When it reaches this point, use an egg flip to fold the omelette in half.
4. Use the egg flip to cut the omelette into parts (one per person), then put it on rice on a plate.
5. In a small bowl, combine sesame oil and oyster sauce. Spoon this over the omelette and garnish with extra coriander. The sauce is really great, so don’t omit it!

wilted vegies
In a heated frypan, add a small amount of olive oil. Add whatever vegetables you like: I used mushroom, rocket, crushed garlic, broccoli and coriander. Stir to cook. If it needs more moisture, add a few tbsp water. When vegies are nearly cooked, stir in 1 tbsp soy sauce and some pepper. Cook for 2 mins then serve.

20130306-205900.jpg

20130306-205915.jpg

20130306-205932.jpg

20130306-210143.jpg

What’s in a name? Egg pie (quiche)

My eldest child loves pies. Party pies in particular, but he can generally be tempted by any pie. Quiche, he’s not so keen on. I remember, growing up, that my (boy) cousin used to always sing a country song about how real men don’t eat quiche. Maybe it’s all in the name, ‘quiche’.

Names are important, they attract or repel us. Food names in particular have the capacity for coercion. ‘Jus’ sounds much sexier than ‘gravy’, which you get at the local takeaway joint or at Nana’s (or at my place 😉 . Similarly, ‘salmon’ evokes images of a pinkish orange, juicy, luscious fish, but it’s also a simple, white fleshed fish that you can catch off the Victorian coastline. So, what you call something influences perceptions of it.

Which brings me back to quiche. When I renamed it to ‘egg pie’, a light suddenly went on in h’s eyes. ‘Pie? Can I have some for dinner?’ Ya see what I mean?

The great thing about quiche aka egg pie (QaEP) is that you can customise it however you like. Here I have given you a recipe that could even be considered a frittata as it doesn’t have a crust (I don’t eat wheat and the aim of this is quick/simple/easy, which homemade pastry is not so much). If you want a crust, just line your pan with a sheet of puff pastry before you pour the egg mix in.

Some ways you might wish to adapt this are listed below. But enjoy my QaEP!

QaEP

You will need:
8 eggs
1/2 cup milk
Pepper
Salt (if you must 😉
A good handful of rocket or spinach leaves
Three or four sprigs of mixed herbs, removed from the woody stems (adjust to taste)
1 cup grated cheese
1/2 punnet (or so) cherry tomatoes (I used half a bowl of mixed little tomatoes from the garden), some of which could be cut up

1. In a large bowl, whisk together eggs, milk and seasoning til it’s well combined.
2. Stir in the rest of the ingredients.
3. Pour into a lined 20cm cake tin.
4. Put into an oven preheated to 180C.
5. Bake for 20-25 mins or until the QaEP is cooked through. If you shake the tin, it should wobble a bit but this will be all together, as a whole (ie not ripples!). It should also be nice and brown.
6. Serve with salad / sauce / vegies (depending on who is eating it!)

Some variations:
Caramelised onions / leeks
Leftover roast meat / vegies
Smoked salmon
Ham (as per quiche Lorraine)

20130226-201422.jpg

20130226-201429.jpg

20130226-201436.jpg

Oh, to be a fish on a (sweltering) day like this: ‘super food’ salad

It’s too hot this week to do much. The garden is full of plants drooping in the heat, no matter that they are well watered. The kids too are drooping in their ability to maintain good humour after being cooped up inside all day (high sunburn risk), no one is sleeping…

The life of a fish is therefore looking pretty appealing: swimming around in the cool water all day and, um, swimming… cool… I can’t think beyond that!

In honour of this heat wave, and because my partner is currently in the midst of a salmon obsession, I whipped the following salad up for dinner tonight. It contains at least three ‘super foods’ but, most importantly, is simple and yummy.

All of the proportions here can be adjusted to taste. I don’t like salty food so next time, I’ll go a bit lighter on the dressing for me, but B and our friend (and tonight’s dinner guest!) T thought this was perfect.

Quinoa and salmon salad

This is a recipe in stages, so I have listed these in order…

1. Cooking the quinoa
1 cup white quinoa
2 cups water
Place quinoa in water in a saucepan over high heat. When the water is boiling, turn to simmer. Cook until the water has been absorbed and the quinoa are soft. Turn off heat and let stand for 5 minutes. Spoon into the bottom of a salad bowl

2. Salmon
Salmon cutlets; I had one huge one that was about 500grams
1/8 cup tamari (I like salt-reduced)
3 tbsp mirin
1 tbsp sesame oil
In a bowl or jug, mix tamari, mirin and sesame oil together. Season with pepper if you like. Place salmon on a plate or bowl. Pour most of the tamari mic over the salmon, reserving a little bit for later. Let sit for 10 mins or so, then fry covered until cooked; flip and repeat on the second side.

3. The salad ingredients
Cucumber (we used about 10 cm of a continental cucumber), sliced
3 – 4 big handfuls rocket salad mix
1/2 avocado, diced
1/4 pomegranate, seeds only
1 punnet or a big handful cherry tomatoes
1/2 cob corn, kernels removed and blanched (just put in a pan and pour over boiling water; give it about a minute then drain)
1 handful green beans, cut into 3 cm lengths (blanch in the same way as corn)
1 baby capsicum, diced roughly

To assemble: put quinoa in bottom of salad bowl then arrange salad ingredients on top. Mix well. Drizzle over the reserved marinade (makes a nice dressing too). Then place pieces of salmon on top. If you have any spare sauce in your frypan, pour it over too.

Yummy! This gave three of us enough for seconds (yes, it really is good!)… Add more of everything to make more. Customise it however you like! Enjoy – and keep cool 😉

20130218-222602.jpg

20130218-222613.jpg

Saturday n breakfast! Quick crepes

There are certain foods that can be had at any time of the day- morning, noon, or night. Sometimes they are sweet, sometimes savoury. Sometimes it depends on where you are (I’m big on the influence of context). After years of loving Nasi Lemak (rice, curry, and condiments) for lunch or dinner at our local curry place, I was awed by the fact you can have it for breakfast, yes breakfast!, in Malaysia. Too good. I went curry-crazy that trip 😉

But I digress… An even more special category of foods includes those that can be eaten any time of day, regardless of context, and can be savoury or sweet. Pancakes, crepes and pikelets fall into this category – and are so simple to make. Here I share my basic pancake batter with you. Want crepes? Add more milk. Want pikelets? More flour. Fritters? Add grated or finely cut vegetables (eg zucchini, corn), cheese (feta is nice), herbs… Whatever you fancy. Flip em out of the pan onto a plate and eat them before they cool!

An out and about suggestion: once you’ve poured your batter into the pan (small disks), sprinkle over some sultanas. When the bubbles appear, flip the pancake til it’s cooked, then take the lot down to the playground for morning tea!

Basic Pancakes
You will need:
1 cup self-raising flour or 1 c plain flour + 1 tsp baking powder
1 egg
1 tbsp butter or margarine, melted
1 cup milk (vary depending on what you are hoping to make: pancakes, crepes or pikelets)

1. Place all ingredients into a mixing bowl and mix well.
2. Tip into a jug.
3. Over low-medium heat, heat a frypan. Add a small tsp butter or a spray of oil. Non stick pans don’t really need anything.
4. Pour in the desired amount of batter then lift the pan by the handle, moving the batter around until you have the ideal shape.
5. When bubbles appear on the batter surface and break, it’s time to flip your pancake.
6. Give the second side enough cooking time to brown, then lift into plate. Repeat til the batter has gone.

Sweet topping ideas: lemon and sugar, jam, Nutella, golden or maple syrup, strawberries, any combination of these

20130216-142350.jpg

20130216-142405.jpg

20130216-142421.jpg

Sunday riches: feasting at Nigina Express

At the moment, I’m preparing a workshop to run with our PhD students on writing. I enjoy writing; that’s part of the reason why I decided to blog about my (culinary) life. Blogging is also a good way to work my writing out – kind of like a writing gym; each sentence is a set, each paragraph a circuit. But I think that writing isn’t just writing: there’s an art and a craft to it. Joanna Penn at the Creative Penn says that this is an important distinction: “Art is subjective, its beauty lies in the eyes of the beholder … but craft is objective. There is a right way and a wrong way to craft” (http://www.thecreativepenn.com/2011/09/05/art-craft-writing/). She further indicates that the craft is functional, while art is about beauty.

If we turn to the kitchen, these same notions apply. Some people cook in a way that is functional; for them, cooking is craft. I fall firmly into this camp; for me, cooking is a type of alchemy, bringing together different elements to make something functional. For other people, cooking is both craft and art. I don’t think cooking cannot incorporate craft, because it’s always functional: at the end of the day, you want it to be something that someone can eat and enjoy. But for this latter group of people, cooking is also art; it’s about creating something beautiful, pleasing to the senses (particularly sight, smell, and taste).

My friend, Regina, is one of these arty cooking people. She prepares beautiful menus, regardless of whether she is making things that are complicated or simple. Given her love for Nigella (Lawson), it’s unsurprising that her is known as ‘Nigina Express’ 😉

Yesterday afternoon, we were lucky enough to head over to Nigina Express for a bit of alfresco feasting (sounds much better than ‘scoffing myself in my friend’s backyard’!). While H paddled in the pool and the Bubaloo grooved to ‘Gangnam Style’ (and can now do the dance, thanks to lovely 10 year old D), I photographed the three family friendly courses: Pigs in Blankets, Chicken with Greek herb sauce, and flourless chocolate cake. The first two are courtesy of Nigella Lawson, and the third is out of Regina’s recipe book!

Pigs in blankets with mustard dipping sauce (they’re also good with tomato sauce)

You will need:

2 sheets defrosted puff pastry

1 egg

16 frankfurters

1. Preheat the oven to 220C. Roll out the sheets of puff pastry to make it a bit thinner, to make one long side. Cut the rectangle into 1/4s, then cut each rectangle in half lengthwise, to give 8 small pastry strips.

2. Beat the egg in a small bowl and paint each pastry section with the egg wash. Sit a frankfurter horizontally on the side of one pastry strip and roll it up until it just seals. Do this with all frankfurters/pastry.

3. Cut each rolled frankfurter into 4 small pieces, squeezing the pastry around the sausage as you go. Place on a lined baking tray. Repeat with the other sheet of pastry.

4. Paint the franks in the egg wash and bake for 15-20 minutes or until golden brown.

Mustard dipping sauce: In a bowl, mix together 100g wholegrain mustard, 100g Dijon mustard and 2 tbsp sour cream.

YUM Yum yum…

015

Chicken with Greek herb sauce

You will need:

12 chicken thighs

juice of 1 lemon

4 tablespoons olive oil

salt and pepper

1. Preheat the oven to 200C. Place the chicken thighs (skin side up if they have skin on) in a roasting tin, then pour over the lemon juice and olive oil. Season with salt and pepper. Place in the oven and roast for 45 minutes.

Greek herb sauce: 500ml plain Greek yoghurt, 4 large/6 small spring onions, 1 green chilli (deseeded), 1 clove peeled garlic (crushed), 1/2 cucumber (finely diced), 3 tablespoons each of chopped fresh coriander, mint and/or dill, salt and pepper. Put all ingredients together in a bowl and mix to combine. Season to taste.

Serve with baked potatoes

017 021

Flourless chocolate cake

This cake has the most gooey yummy centre; we can’t get enough! Ingredients are in italics.

1. Melt together 250g chocolate and 250g unsalted butter. Cool and set aside.

2. Whisk 6 egg whites until stiff. Set aside.

3. Whisk 6 egg yolks with 3/4 cup castor sugar, 1/4 cup light brown sugar, then add the chocolate mixture. Fold in 1/2 cup almond meal, 3 tbsp flour and 1 tbsp egg white mixture. Fold in remaining egg white mixture.

4. Bake in a 23cm cake pan at 190C for 25-30 minutes, or until the cake is cooked but still has a slight wobble.

At Nigina Express, this cake is served with persian fairy floss – H’s favourite! Try and stop after 1 piece!

023 024

A bit of comfort (food): meatloaf for the masses!

Occasionally a week comes along that doesn’t rock my world. They’re the weeks when silly things go wrong, when you receive not-great news, or, like this week just gone, when an instantaneous and thoughtless bad decision leads to a bit of grief. You know the weeks I mean… Everyone has them. They’re the times when you just need a hug, or something like a hug. Which brings me to the point of this post: comfort food, the sort of thing that hugs you from the inside out. Or which feels like it is. Meatloaf is one of those foods.

Growing up in a very small, remote town, comfort food was mum’s version of spaghetti bolognese, chow mein, or just chops or sausages with vegetables (usually mashed potatoes, peas and carrots). I never heard of meatloaf until I read Judy Blume’s books, and it was certainly not something that I had eaten. As an adult, the idea of meatloaf was less than appealing. This was partly about the aesthetics of it – admittedly, meatloaf won’t win any beauty contests – but it was more about my prejudices about what constituted ‘proper’ food.

The first time I tried meatloaf, I was in my mid-thirties and had made it after a) H had tried it at childcare and gobbled it all up (anyone who has had a non-eater will know that this means you need to make that dish for every meal from now on) – including the vegies on the side, and b) a recipe for meatloaf had just appeared in the ‘Good Weekend’ magazine, written by Matthew Evans, the Gourmet Farmer (http://www.matthewevans.net.au/). At the time, he wrote a weekly recipe column, unadorned by photographs and with a pithy little story about the provenance of the recipe: meatloaf, he wrote, was just like a terrine and therefore, not just kids’ food.

Since then, I’ve made this countless times and each time, regardless of the variations I make, it still tastes awesome – and everyone loves it. This past weekend, I made one batch and from this got 2 mini meatloaves and one bigger loaf. With vegetables and/or salad, it feeds our family of four for two dinners and one lunch…

My recipe below varies from the original Matthew Evans version, but I love his name for it, and so have kept it here. My additions are indicated in the ingredient list in italics, below.

Not your ordinary meat loaf

2 tbsp olive oil or butter

1 large onion, peeled and finely diced

1 stick celery, finely diced

5 sprigs thyme, leaves stripped if stems are woody

50g bacon, finely diced (or 1 rasher)

600g beef mince

400g pork mince (for ease, I generally just use 50:50 of the two mince types)

1/4 c tomato sauce

3 tbsp barbeque sauce

1 carrot, grated

1 zucchini, grated

2 eggs

fresh breadcrumbs from 2 slices of bread – sometimes I use about 3/4 c cornflake crumbs

1 tbsp Dijon mustard

1 tsp salt and 1/2 tsp freshly milled black pepper

50g grated Italian parmesan

I find it works fine without the Dijon or parmesan; I often forget the parmesan until it’s in the oven!
1. Preheat oven to 200C. Heat the oil in a large wide frying pan over a modest flame and cook the onion, celery, bacon and thyme, with a lid on but stirring often, for about 10 mins or until the onion is very soft.

2. Let this cool slightly, then mix it into the remaining ingredients in a large bowl. You will need to use your hands to combine it, or it will take ages to mix.

3. Press this mixture into a lined 1.5 litre loaf tin or similar.

4. Bake for 50-60 mins or until a roasting fork inserted in the centre comes out warm, and there are no more pink juices (it won’t hurt if it’s slightly underdone). It’s a pretty moist recipe, and the cooked juices are nice spooned over your slice of the meatloaf.

5. Serve the meat loaf hot with baked or mashed potatoes and plenty of tomato sauce. Any leftovers are best served at room temperature.

As I’m not a food stylist, I couldn’t take a nice photo of my meatloaf – so forgive the aesthetics and don’t let this poor photo put you off!

013

Sometimes a bit of care is needed: sponge cake

As you’ve no doubt guessed, I’m a bit of a haphazard cook. I like to measure things using coffee mugs and cutlery out of the drawer, and I like to play fast and loose with recipes. The temptation to leave it alone is beyond me; I can’t help but substitute things, change proportions (especially sugar, which I usually halve) or simply add extras. This has usually worked out in my favour, but sometimes I’ve come across a dish that I love but that is too complicated, fiddly or simply too temperamental to fiddle with. Sponge cake (I guess they are like a Victorian sponge cake) is definitely one of those. (You can read more about them here: http://en.wikipedia.org/wiki/Sponge_cake)

Growing up, my mum’s aunty Ruby used to make the most delicious sponge cakes for any occasion. Birthdays… Aunty Ruby made a sponge. Engagement parties… Aunty Ruby made a sponge. Afternoon tea… You guessed it, a sponge. Unfortunately, she passed away two years ago and so her sponge cakes are now just a (very) fond memory. It wasn’t just the cake itself, although that was perfect and light. She just seemed to get the balance of cream, fruit and jam perfect. I’m still yet to get the balance of the toppings right, but after many failed attempts, where my sponge cake ended up the thickness of a pikelet, I finally hit the jackpot with the cake part a few years back.

Sponges are cantankerous things to make: it’s all about keeping them airy and light, so a heavy hand is an absolute no-no. They also require a combination of technology (to beat the eggs) and good old elbow grease (just a touch) to get it right. It’s hard, but in making your sponge, if you think it’s not quite mixed enough, it’s probably best to call it perfect! This recipe featured in the Epicure section of the Age newspaper some years back; it’s attributed to the Country Women’s Association, but it doesn’t feature in their cookbook. I think this tells me about the idiosyncratic nature of the sponge: everyone has their own variation. But I love this one. I don’t dare play with the proportions because of my previous pikelet efforts… (Touching wood) it hasn’t failed me yet, and today my sister made it for the first time… she said it’s perfect! The most imperfect thing about a sponge? They don’t last long enough!

Never fail sponge (from the CWA Victoria ladies)

You will need:

4 eggs, separated

pinch of salt

3/4 cup castor sugar

1 tsp vanilla

3/4 cup cornflour (we use gluten-free because of a wheat intolerance, but it works equally well with wheaten cornflour)

1 tsp cream of tartar

1 large (heaped) tbsp custard powder

1/2 tsp bicarbonate of soda

1. Preheat oven to 175C. Grease well two 20cm round or square sandwich tins. Aluminum tins are recommended by the CWA for sponges…

2. Beat egg whites with salt until soft peaks form. Gradually add castor sugar (while beaters are still going). Beat until still peaks form, and the mix is looking very thick.

Image

3. Using a metal spoon, gently fold in the egg yolks and vanilla. Don’t mix it too much, just til the yolks are broken and they are just blended in.

4. Twice sift the dry ingredients together, and then gently fold through the egg mix. Again, use a metal spoon and don’t mix too much – just until it is combined. You need to keep as much air in the mix as possible.

5. Turn into the well-greased sandwich tins – you should get enough for two tins, but you could make one big cake that you slice in half (some people prefer to do that). It rises a fair bit. Bake in the middle of the oven for 20-25 minutes or until the sides of the cake have shrunk a little from the sides of the tin.

6. Turn out to cool, then fill with cream and fruit. Enjoy!!!

Here is one I made on the weekend for my 86 year old neighbour’s birthday…

Image

My sister’s much more beautiful effort!

Image